Stop Leaky Faucets By Replacing The Seals

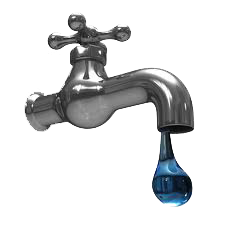
To Stop Leaky faucets which are not uncommon, especially in households that use a lot of running water. If you have a larger family or simply use your faucets regularly, I am willing to bet that at least one of them is leaking now. Leaks range from a drip to water that flows from a closed facet. As with everything in your house, taking care of the issue early (when it is just a drip) will help save you from calling an emergency plumber when things go bad (seals break and water continuously flows).
In order to stop faucets from leaking, the most common thing that you can do, is replace the seals. Each faucet contains a rubber seal, which helps keep water from flowing when the faucet is turned off. As pipes are metal, there is no way to guarantee a connection when the faucet is closed unless you solder it shut. As a faucet needs to be turned on and off on a regular basis, soldering is not the answer and is the reason why rubber seals are used.
Keep in mind that rubber is not as strong as metal and that over time rubber will wear out and break. Also, rubber is not intended to last forever. As you have to replace the rubber on your car (tires), so should you replace the rubber seals in your faucets. Another common reason why they wear out is referred to as “dry rot.” When a rubber seal gets wet, then dries out from non-use (let’s say that you are out of town a lot and do your faucets may go weeks at a time without use), it starts to expand and retract. This action causes the rubber to crack or “rot.” Once this happens, water will flow through the cracks on the seal and it will be the same as if you had no seal at all.
Replacing a seal in a faucet is relatively easy. First, if you do not feel comfortable with the project, you will want to call a plumber. If not, you could cause damage to the water line and end up paying more to an emergency plumber when things go wrong. Before you start, make sure to shut off the water at the stopcock. You do not need to shut the water off at the stopcock to the entire house, just simply shut off the water at the isolation valves located under the sink where you are replacing the seals. After you shut off the water isolation/stopcock, turn the faucet on to make sure that there is no flowing water.
Now that the water is off, it is a good idea to place a towel or a bowl in the sink to catch any parts from the faucet that may drop during the seal replacement. Once you are sure that you have blocked the drain so that you do not lose any parts, the handles to the faucet will have a cover that needs to be removed as the cover hides the screws that attach it to the fixture. Once the cover is removed, simply unscrew the handles and pull them apart (remember which order the parts are removed as you will need to return them in the same order). The seal will be a small rubber ring, sometimes referred to as an O-ring, and looks similar to a small black rubber band. Remove the ring and either, take it to a local store that sells plumbing supplies or use the manufactured recommended seals if you still have the manual that came with the faucet. Simply reverse the order of the above once you replace the seal, and the drips that you once had will now be taken care of.
Similar to Stop Leaky Faucets is the How to fix a leaky faucet.

